Pass it on
No install needed — it runs in any browser.
Drum Rack is on the App Store
The iPhone version is live. The same drum machine you just played, running natively on your phone. Free, no ads, no account, nothing collected.

Android version coming soon
Drum Rack is in closed testing on Google Play. Leave your address and you get one email when it lands. Nothing else.
A drum machine that runs in this page. Four synthesised voices — kick, snare, hat, clap — a sixteen step sequencer, and a WAV export you can drop straight into your DAW. Nothing to install, nothing to sign up for, no samples to download. Every sound is built from oscillators and noise on the spot, which is why the whole thing weighs less than a photograph.
The kick is the reason it exists. Most drum machines hide the kick behind two or three knobs. Here you draw its pitch envelope yourself: drag the nodes, bend the curve between them, and watch the rendered waveform redraw as you go. It is a three layer build — a click for the attack, a pitched punch for the body, and a sub that carries the weight — the same architecture I use for my own releases as FDR-Sound.
Welcome to the drum machine tutorial for the Lumlux Art Lab Drum Rack, a four-voice drum machine that runs entirely in your browser. This drum machine tutorial walks through every button, knob and gesture in the order you will meet them, so you can start with a preset and end up building patterns from nothing. Nothing uploads to a server, and the tool keeps working after you switch the network off.
The quickest route in: pick a preset, press Play, then start tapping squares. You cannot break anything. Clear empties the pattern and choosing a preset again puts everything back.
No sound? Browsers refuse to make noise until you interact with the page. Click or tap anywhere first, then press Play.
Drum machine tutorial: the transport panel
The top panel holds everything that applies to the whole machine.
| Control | Range | What it does |
|---|---|---|
| Play | — | Starts and stops the sequencer. The button label and the status line both follow along. |
| Tempo | 60 – 180 BPM | Speed. Move it while the pattern runs and the change lands on the next scheduled step. |
| Swing | 0 – 60% | Delays every second sixteenth, which gives a pattern its shuffle. At zero everything sits dead on the grid. Triplet grids switch swing off automatically, because there it means nothing. |
| Preset | 18 patterns | Loads a complete patch: the pattern, every knob and the kick pitch envelope. It resets the meter to 4/4 at 1/16 and clears per-step editing. |
| Randomize | — | Rolls a new pattern using sensible odds per voice. Kicks land on beats, hats fill in between. It rewrites only the pattern and leaves the sounds alone. |
| Clear | — | Empties every lane, including levels, nudges and rolls. |
The presets cover house, deephouse, disco, afro, techno, trance, bigroom, hardstyle, breakbeat, electro, garage, dnb, jungle, boombap, trap, dubstep, reggaeton and eighties.
Programming a pattern in this drum machine tutorial
Four rows, one per voice, each divided into steps. Tapping a square cycles it through three states and then back to the beginning.
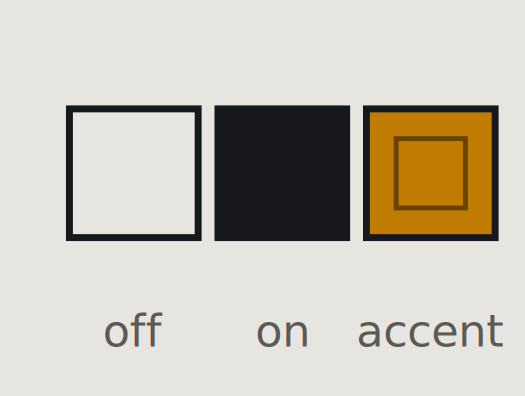
An accent is simply a louder hit: the same sound at full level, where a plain step plays at roughly seventy percent. For a level in between, hold the step instead, which the next section covers.
Hold Shift while you click to jump straight to accent, and Shift-click again to clear the step. That saves a lot of tapping while you lay down a kick pattern.
Reading a square
Once you edit individual steps, each square carries more information than on and off.
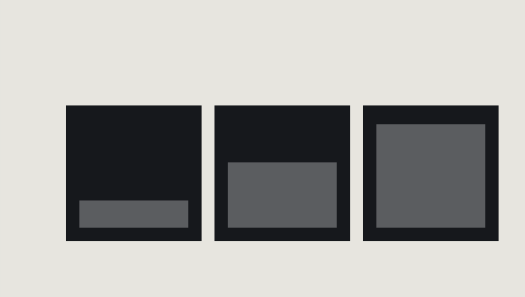
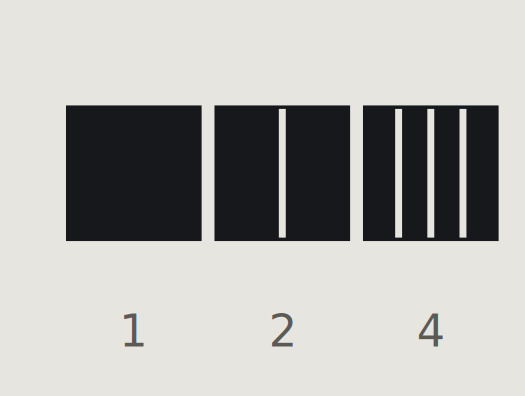
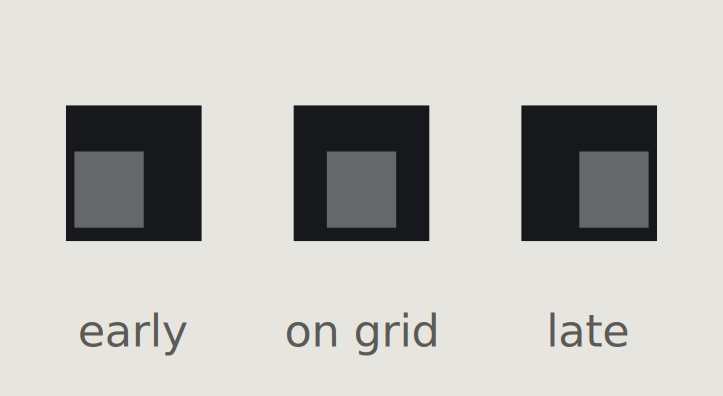
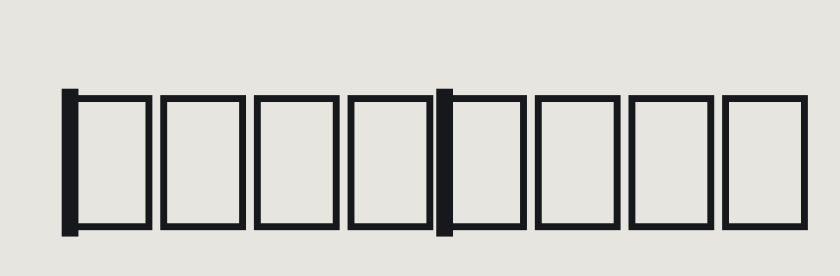
While the sequencer runs, the step sounding right now takes a blue outline, and a blue line sweeps across the grid above the lanes.
On a phone The grid scrolls sideways whenever it outgrows the screen, which happens from about twenty steps upwards and always at 1/32. Swipe across the grid to move it.
Drum machine tutorial: editing a single step
Press and hold a square for about half a second, or right-click it on a computer, and a small panel opens under the grid. It covers that one step in that one lane, and a blue outline marks the square you are working on.
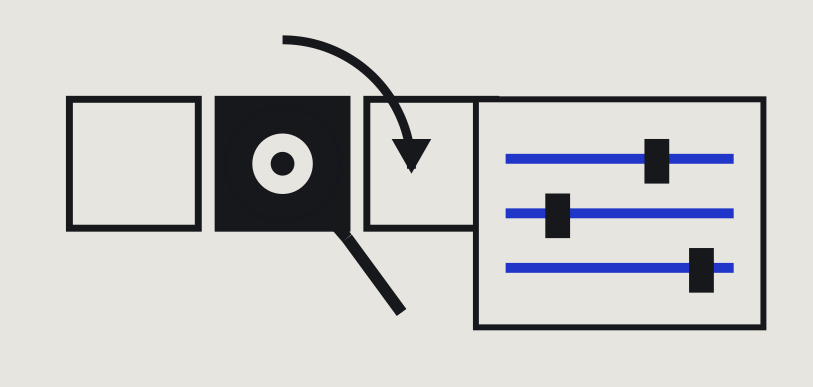
Holding an empty step punches it first, so you never need to tap and then hold.
Level
The volume of that single hit, from silent to full. The accent toggle sets the same thing; accent simply sits at the top of this range. Varying the level across a hat line remains the quickest way to stop a pattern sounding mechanical.
Nudge
Moves the hit off the grid, up to half a step early or half a step late. Small amounts make a lane feel laid back or pushed without touching the tempo. Because it works per lane, you can drag the hats behind the beat while the kick stays exactly on it.
Repeat
Turns one hit into two, three or four evenly spaced hits inside the same step, which musicians call a roll. Each repeat sounds quieter than the one before it, so it never turns into a machine gun. Two repeats on a 1/16 grid match the timing of two 1/32 steps; the difference is that a roll tapers.
Clear step empties the step and resets its timing. Reset timing keeps the level but returns nudge and repeat to normal. Tapping a step off also clears its nudge and repeat, so a silent step never hides settings.
Meter and grid
Everything so far in this drum machine tutorial assumed sixteen steps in four-four time. Two dropdowns above the pattern decide how many steps a bar holds and how long each one lasts. Meter counts quarter-note beats in a bar. Grid divides each beat.
| Meter | Grid | Steps | Feel |
|---|---|---|---|
| 4/4 | 1/16 | 16 | The default, and most dance music. |
| 3/4 | 1/16 | 12 | Waltz. |
| 4/4 | 1/8 | 8 | Half the resolution, two bars in the same space. |
| 4/4 | 1/8T | 12 | Triplets, a shuffle swing cannot reach. |
| 4/4 | 1/32 | 32 | Twice the detail, for fast hats and rolls. |
| 5/4, 7/4 | 1/16 | 20, 28 | Odd meters. |
Combinations needing more than thirty-two steps get refused rather than quietly cut short, and the status line says so.
Nothing gets thrown away The machine always holds thirty-two steps in memory and shows only the ones the meter asks for. Switch from sixteen steps down to twelve and back, and steps thirteen to sixteen sit exactly where you left them.
The four voices
This is the part of the drum machine tutorial where the sounds themselves change. Each voice is a small synthesiser rather than a sample, which is why the knobs reshape the sound itself instead of merely filtering it. Drag a knob up or down. Dragging sideways does nothing.
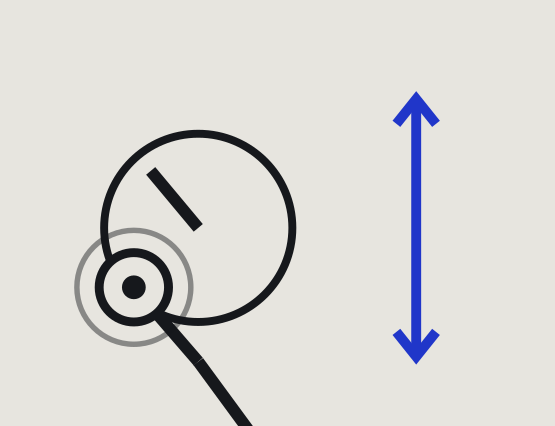
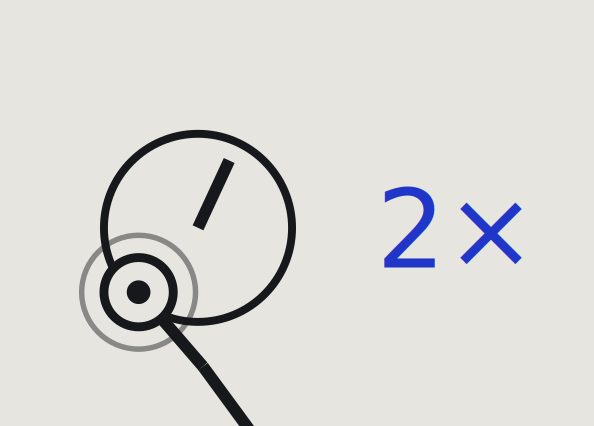
On a computer you can also click a knob and nudge it with the arrow keys. Hovering over a knob shows a one-line description of its job.
The Key line under each voice name tells you which number key triggers that voice, so you can audition a sound before programming it.
Kick knobs
Tune32 – 65 HzThe root pitch, meaning the note the kick lands on. It doubles as the last node of the pitch envelope, so moving one moves the other. Punch60 – 600 msHow long the pitched body rings before it fades. Short gives you a tight click; long gives you a boom. Sub decay80 – 1200 msHow long the pure sine underneath keeps going after the body has gone. This is the part you feel rather than hear. Sub level0 – 100%How much of that sub sits in the mix. Turn it down for small speakers and up for a club system. Click0 – 100%A very short burst of filtered noise at the front of the hit. It is what makes a kick carry on a phone speaker. Harmonics0 – 100%Adds overtones to the body. Down sounds round and clean, up sounds brighter and harder. The level compensates itself, so this changes tone rather than volume. Drive0 – 100%Soft clipping across the whole kick. A little adds weight; a lot adds grit and shortens the apparent decay.
Snare knobs
Tune120 – 260 HzPitch of the two body oscillators. As with the kick, this is also the last node of the snare pitch envelope. Decay60 – 400 msHow long the noise and the body both ring. Snap0 – 100%The balance between noise and body. Up gives more crack and air, down gives more tone and thud. Tone600 – 4000 HzWhere the noise sits. Low sounds dull and woody, high sounds crisp and papery.
Hat knobs
Tune4 – 12 kHzBrightness, meaning the frequency the noise gathers around. Decay20 – 200 msThe base length of the hit. Open0 – 100%Stretches that decay up to seven times, taking you from a closed hat to an open one. It covers the whole lane, so open a single hat with the per-step editor instead.
Clap knobs
Spread5 – 40 msThe gap between the three noise bursts that make up the clap. Tight sounds like one pair of hands, wide sounds like a room full of them. Decay60 – 400 msThe length of the tail that follows the bursts. Tone600 – 2500 HzWhere the claps sit in the spectrum.
Drum machine tutorial: shaping the pitch envelope
The kick and the snare both carry pitch, and both get a drawn envelope: a line showing how the pitch falls after the hit. Most of the character of a kick comes from this curve. A fast drop from a high starting point reads as punch, while a slow one reads as depth.
The selector in the panel heading chooses which of the two you are editing. The two envelopes stay separate and never affect each other.
Moving nodes
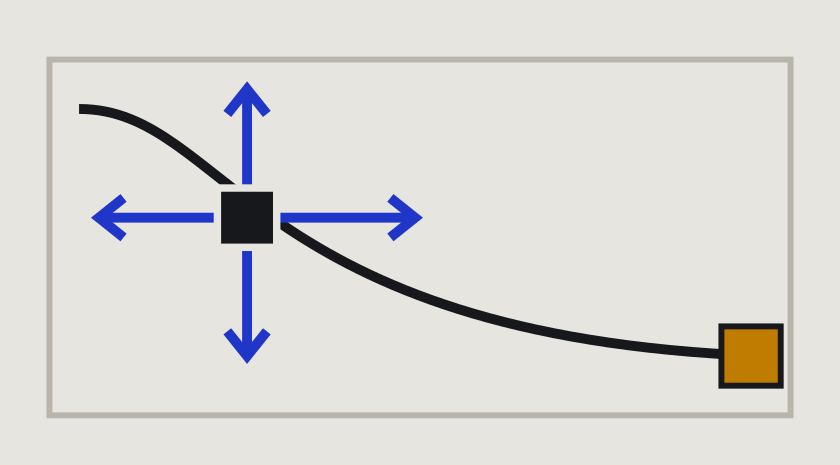
- Tap a node to select it. The three sliders under the graph then apply to that node.
- Drag a node to move it. Sideways sets time, up and down sets pitch.
- Tap the line between two nodes to add a node there, up to six in total.
- Double-click a node on a computer to remove it, or press the Remove button.
The last node on the right is the root, drawn in amber. It is the pitch the sound settles on, it follows that voice’s Tune knob, and it stays put. The first node cannot move in time either, because it marks the moment the hit starts.
Bending the curve
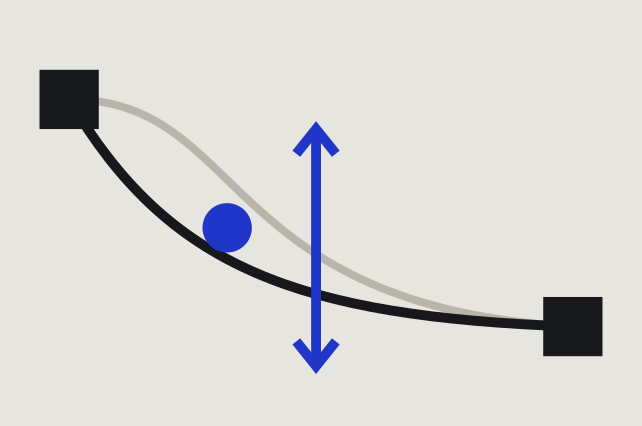
The blue dot halfway between two nodes bends the line between them. Drag it up and the pitch falls quickly then levels out; drag it down and the pitch hangs high before dropping late. Bend belongs to the segment that starts at the selected node, which is why the root node offers none.
Ready-made shapes
The Envelope shape dropdown loads four ready-made curves as starting points: Punch, Deep, Hard and Flat. They apply to whichever voice the selector points at.
On a phone The graph only claims your finger once a node is selected, so you can scroll straight through it. Tap an empty part of the graph to let go again. If dragging feels fiddly, reach for the sliders, which beat dragging for precision anyway.
The waveform display
This part of the drum machine tutorial covers the only panel you never touch. The panel beside the envelope renders the selected voice offline and draws the result. It shows one hit rather than the pattern. Use it to watch what the knobs do: where the sound actually ends, whether the drive squares off the peaks, whether the click even registers.
It redraws shortly after you stop moving a control rather than during the drag, which keeps the interface responsive while you work.
Mixing and muting
Under each voice’s knobs sits a strip with three controls.
- Mute silences that voice.
- Solo silences every other voice, and several voices can play soloed at once.
- The slider sets that voice’s level in the mix.
Mute wins A muted voice stays silent even while soloed. If a voice refuses to come back, check its Mute button first.
All three settings belong to the patch, so they travel in the shared link and they shape the exported WAV as well. If an exported loop misses a voice, look for a stray solo.
Drum machine tutorial: exporting and sharing
The link is the patch
Every change writes itself into the address bar. The pattern, all the knob positions, both pitch envelopes, the mixer, the meter and every per-step level, nudge and roll live there. Copy the address, or press Copy link, and whoever opens it sees exactly what you had.
Simple patterns keep short links. The longer form only appears once you edit individual steps or change the meter, and links from older versions still open correctly.
Export WAV
This renders the loop offline, faster than real time, and downloads a 16-bit stereo WAV. The Bars dropdown chooses one, two or four repeats. The file carries a short tail so the last hit never cuts off.
The button in the envelope panel writes a single mono hit of whichever voice the selector points at, instead of the loop. Its label follows that selector and reads Export snare WAV once you switch over. Reach for it when you are building a sample library rather than a loop.
Master
The last slider sets the overall output level. A soft limiter follows it, so pushing it up adds density before it adds distortion. It remains the loudest point in the chain, so back it off when an export sounds squashed.
Keyboard shortcuts
Once the rest of this drum machine tutorial feels familiar, these shortcuts take the mouse out of the loop.
| Key | Action |
|---|---|
| Space | Play or stop |
| 1 | Hit the kick |
| 2 | Hit the snare |
| 3 | Hit the hat |
| 4 | Hit the clap |
| Shift + click | Set or clear an accent in one move |
| Arrow keys | Fine-adjust a knob once it has focus |
The tool ignores shortcuts while you type in a field or work a dropdown.
Installing the drum machine
You can install the Drum Rack as an app, after which it runs offline.
- iPhone and iPad: open it in Safari, tap the share button, then Add to Home Screen.
- Android, Chrome and Edge: look for the install icon in the address bar, or find Install in the browser menu.
- Firefox on the desktop does not install web apps. The tool still runs normally in the browser.
Install prompts stay hidden while the tool sits inside another page, so open it on its own page first.
Troubleshooting
Five problems account for nearly everything people report, so this drum machine tutorial ends with them.
No sound at all
Interact with the page first, because browsers block audio until you do. Then check that no other voice sits soloed and that the Master slider is not at zero.
The export is silent or misses a voice
Solo and mute shape the export exactly as they shape playback. Clear them and try again.
Timing drifts or stutters
The tool schedules audio ahead of time, so a slow frame cannot disturb it. A very busy tab still can, however. Close other tabs, and remember that long rolls on several lanes at once create a burst of work at that instant.
I changed a knob and heard nothing
Notes go out slightly ahead of what you hear, so a change lands on the next hit rather than the one currently sounding. At slow tempos and wide grids that gap grows.
I lost my pattern
Check your browser history. Every change wrote a new address, so an earlier version of the patch almost certainly survives there.
That covers the whole drum machine tutorial. Open the Drum Rack and build something, or hear where these sounds end up on FDR-Sound.